
A step by step guide to the lakeFS Cloud playground environment
In this document, you will learn the quickest way to get started with lakeFS, utilizing the playground experience in lakeFS Cloud. Then I will cover how to connect your own storage to lakeFS, so you can run lakeFS against your own data.
Step 1: Register
Go to https://lakefs.cloud and register to spin up a lakeFS environment:
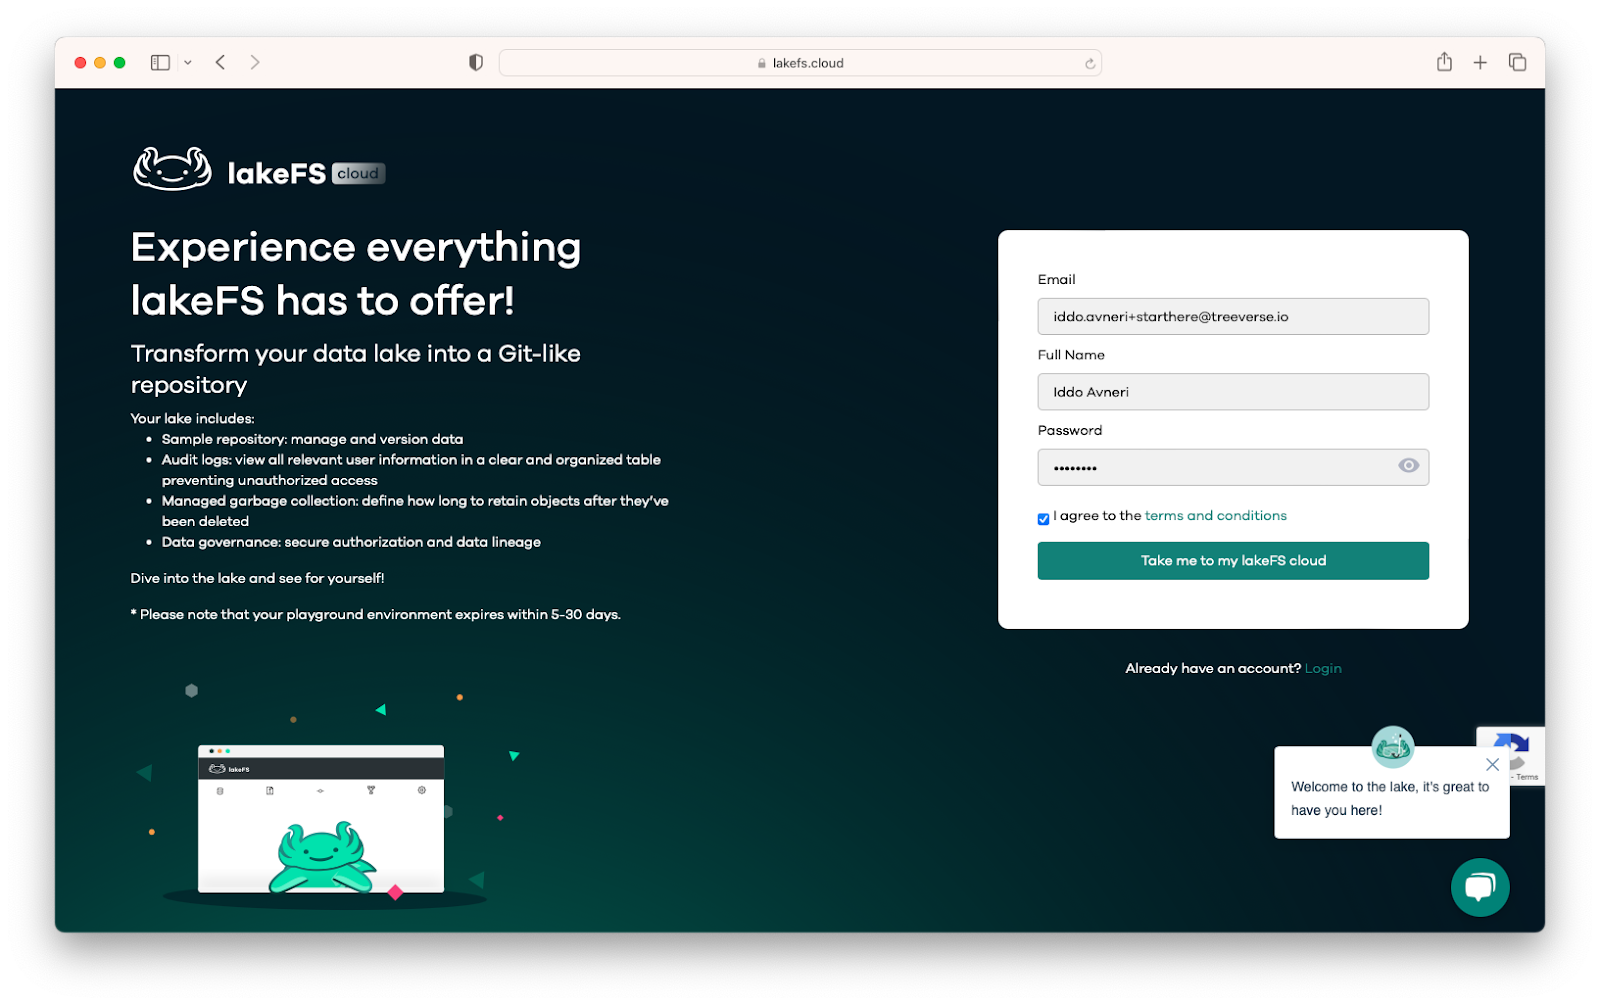
This requires no commitment, credit card etc. Just an easy way to get access and play with lakeFS.
Step 2: Access your lakeFS Cloud playground environment:
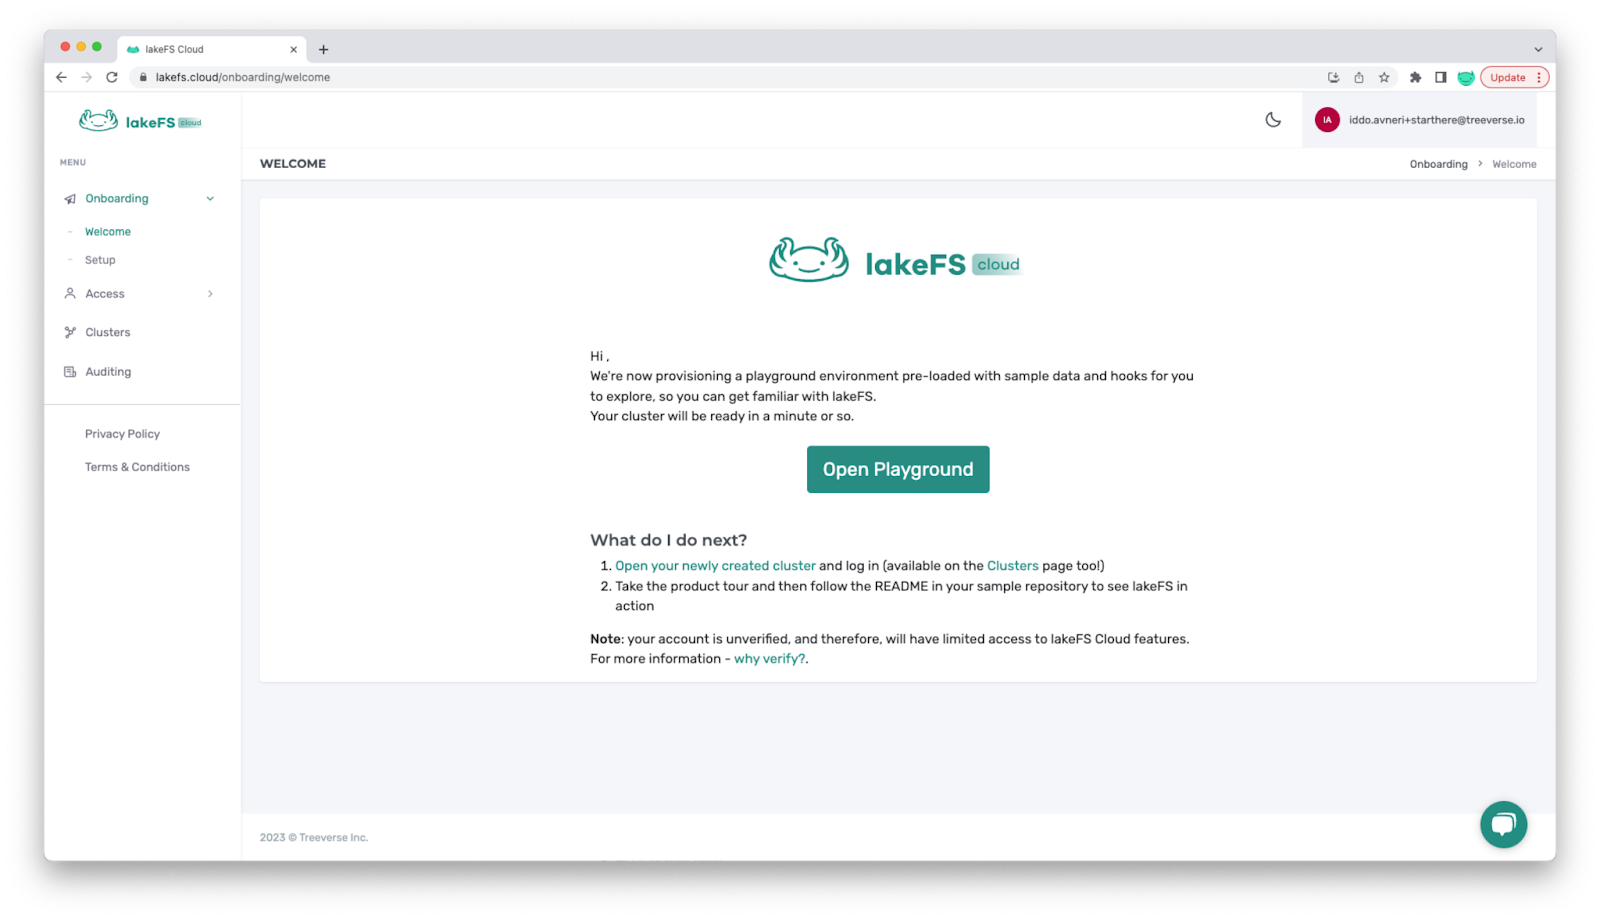
You will immediately be prompted to this page:

Within 30 seconds or so, your playground will be ready for you, as indicated by the “Provisioning…” message being replaced by “Open Playground”:
Note: If at any point you would like to see the status of your clusters, you can click on the clusters on the left side and see if your playground is Ready or not.
Step 3: Play with lakeFS Cloud
So…. We are done ????
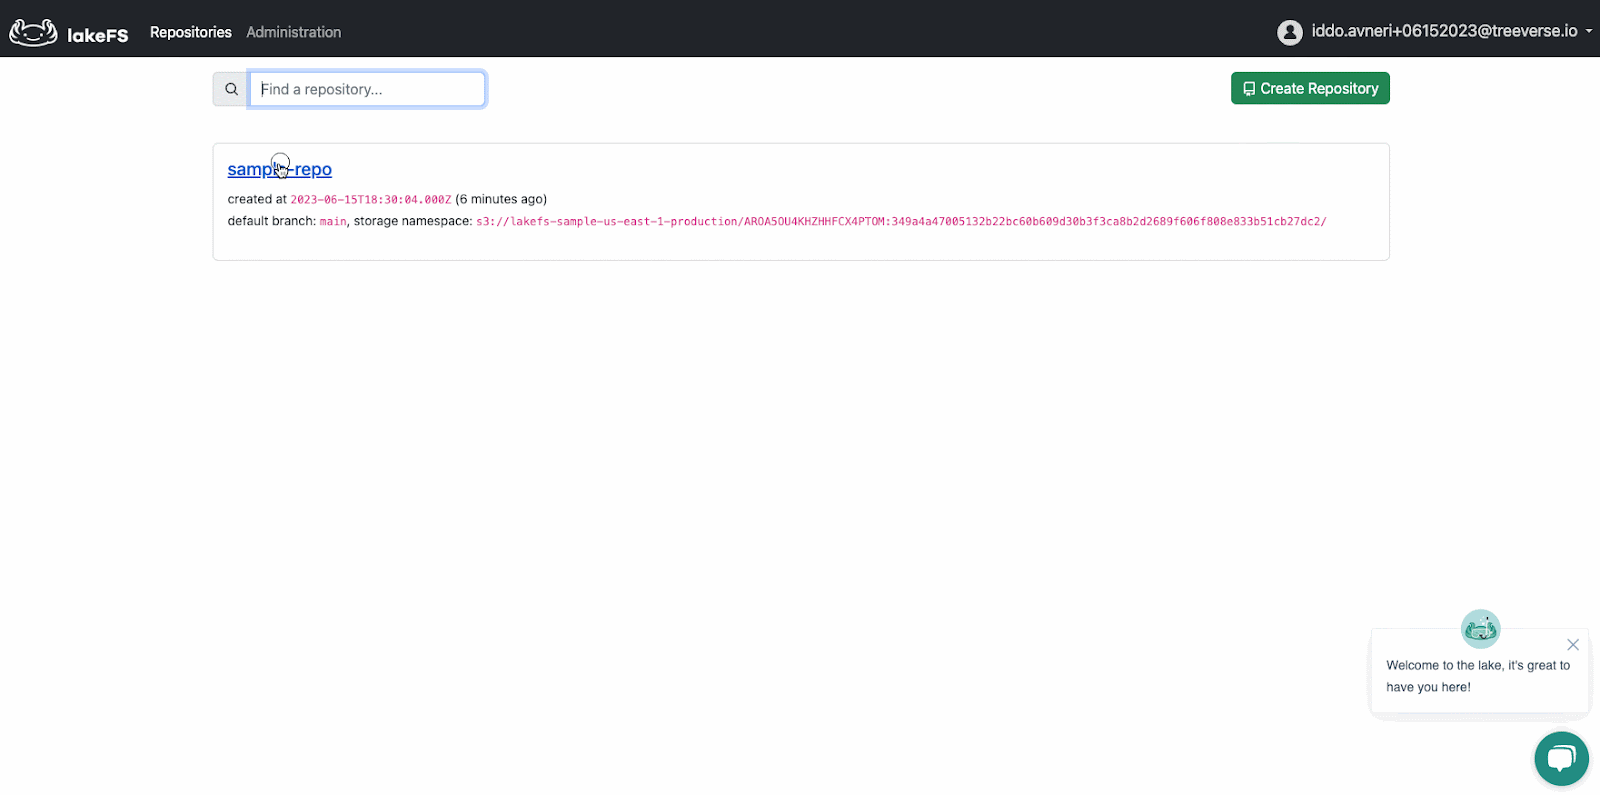
You now have a fully working lakeFS environment that you can play with. The only difference between this lakeFS and “real” lakeFS is that the data here sits on top of Treeverse’s bucket. In the “real” lakeFS, the data sits in your buckets, in place.
A good <optional> next step will be to click on the sample-repo that will include a README walking you through different ways to use lakeFS:
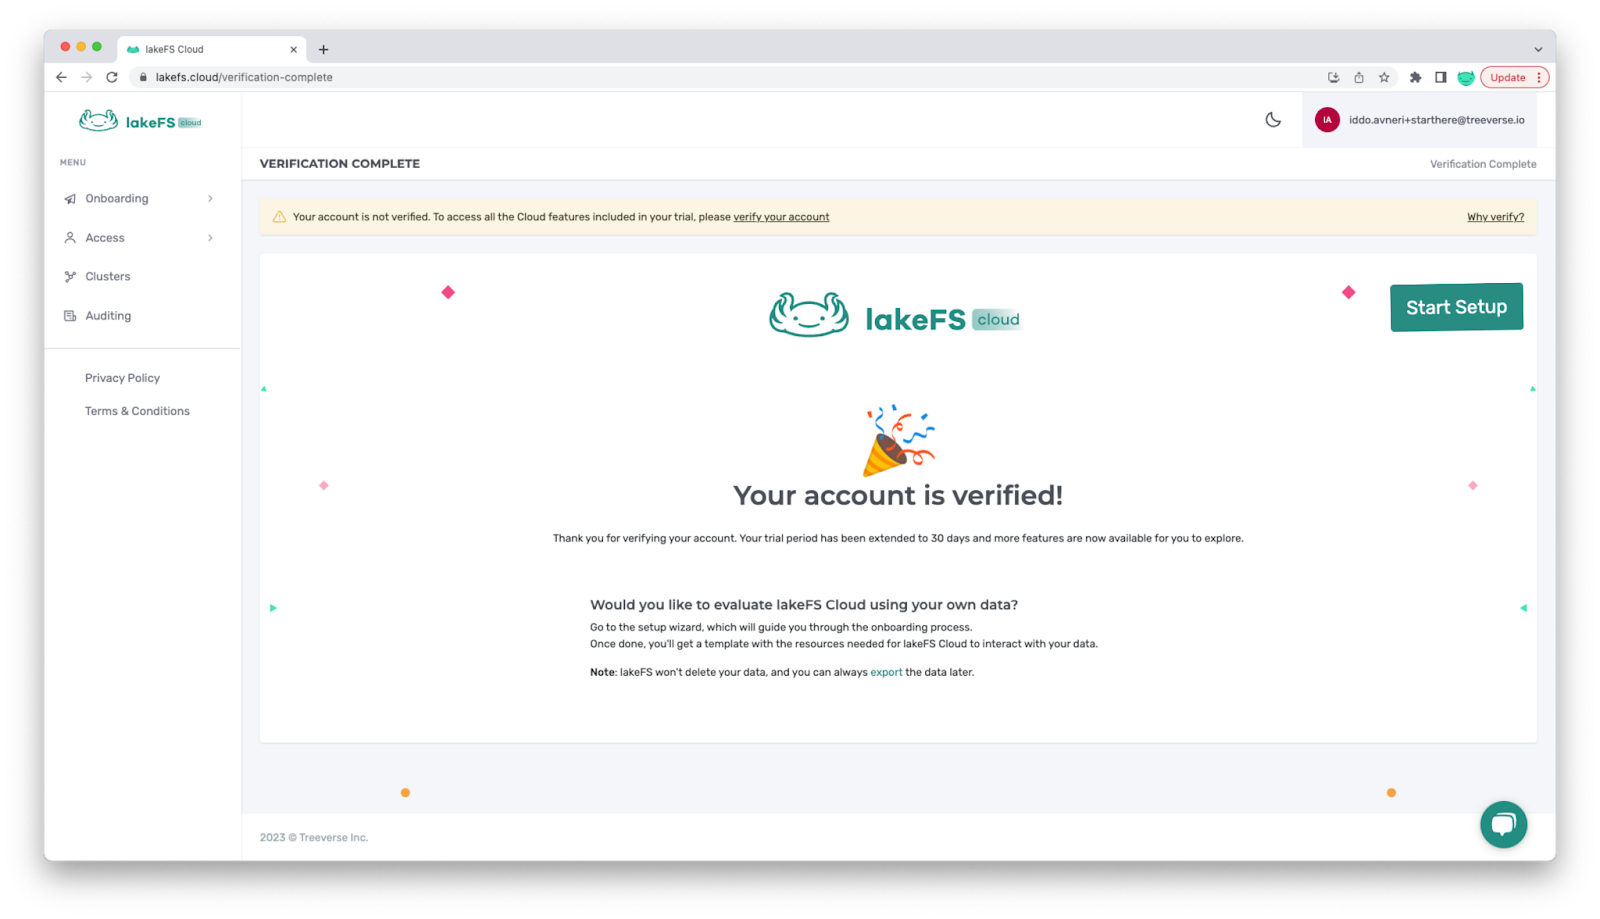
(Optional) Step 4: Verify your lakeFS Cloud account
Check your email ????
When you registered for lakeFS Cloud, you received an email similar to this one:

Click on the lakeFS Cloud link to verify your account (alternatively, paste the code to https://lakefs.cloud/verify ).
Once you veriy your account, you’ll be able to:
- Provision lakeFS Clusters in more regions.
- Use Enterprise features (such as RBAC, SSO and Auditing).
- Connect your own storage.
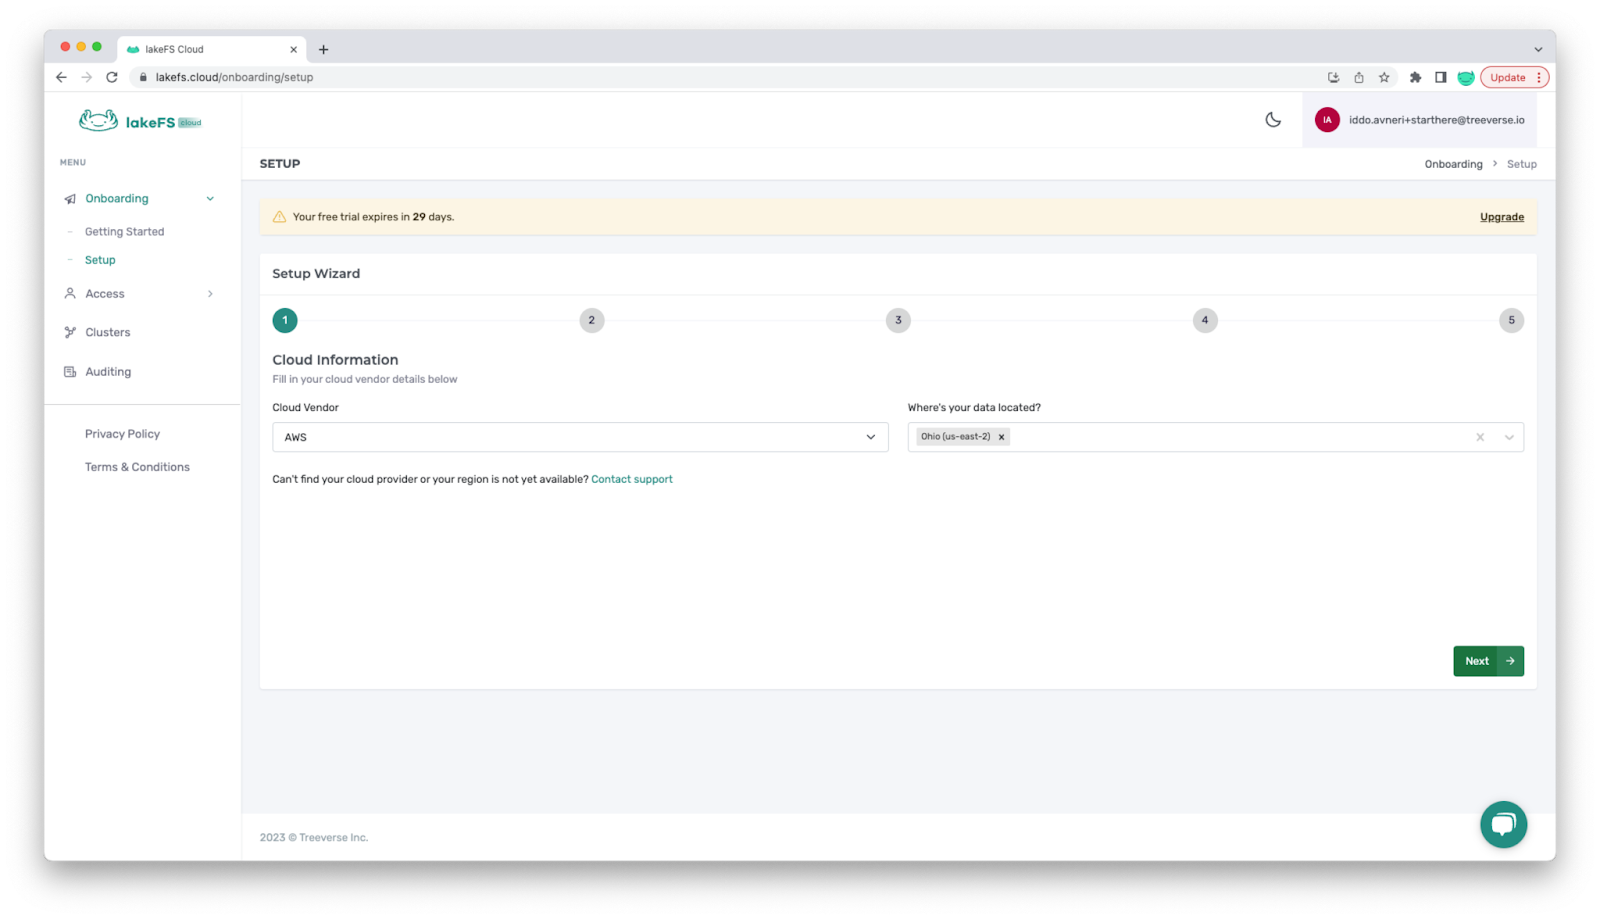
(Optional) step 5 – Setup Wizard
Upon account verification, the Wizard will walk you through all steps necessary to configure lakeFS to work against your storage.
Let’s walk through the different steps:
Select the servers
Select the region(s) in which you would like to run the lakeFS server (you typically want this in the same region as your buckets. The trial is limited to specific AZs, so if you would like to get access to a different region, let us know).
Point lakeFS to an existing bucket
This doesn’t need to be an empty bucket, but lakeFS will not create the bucket for you. Meaning, you will need to already have a bucket created in your AWS account.
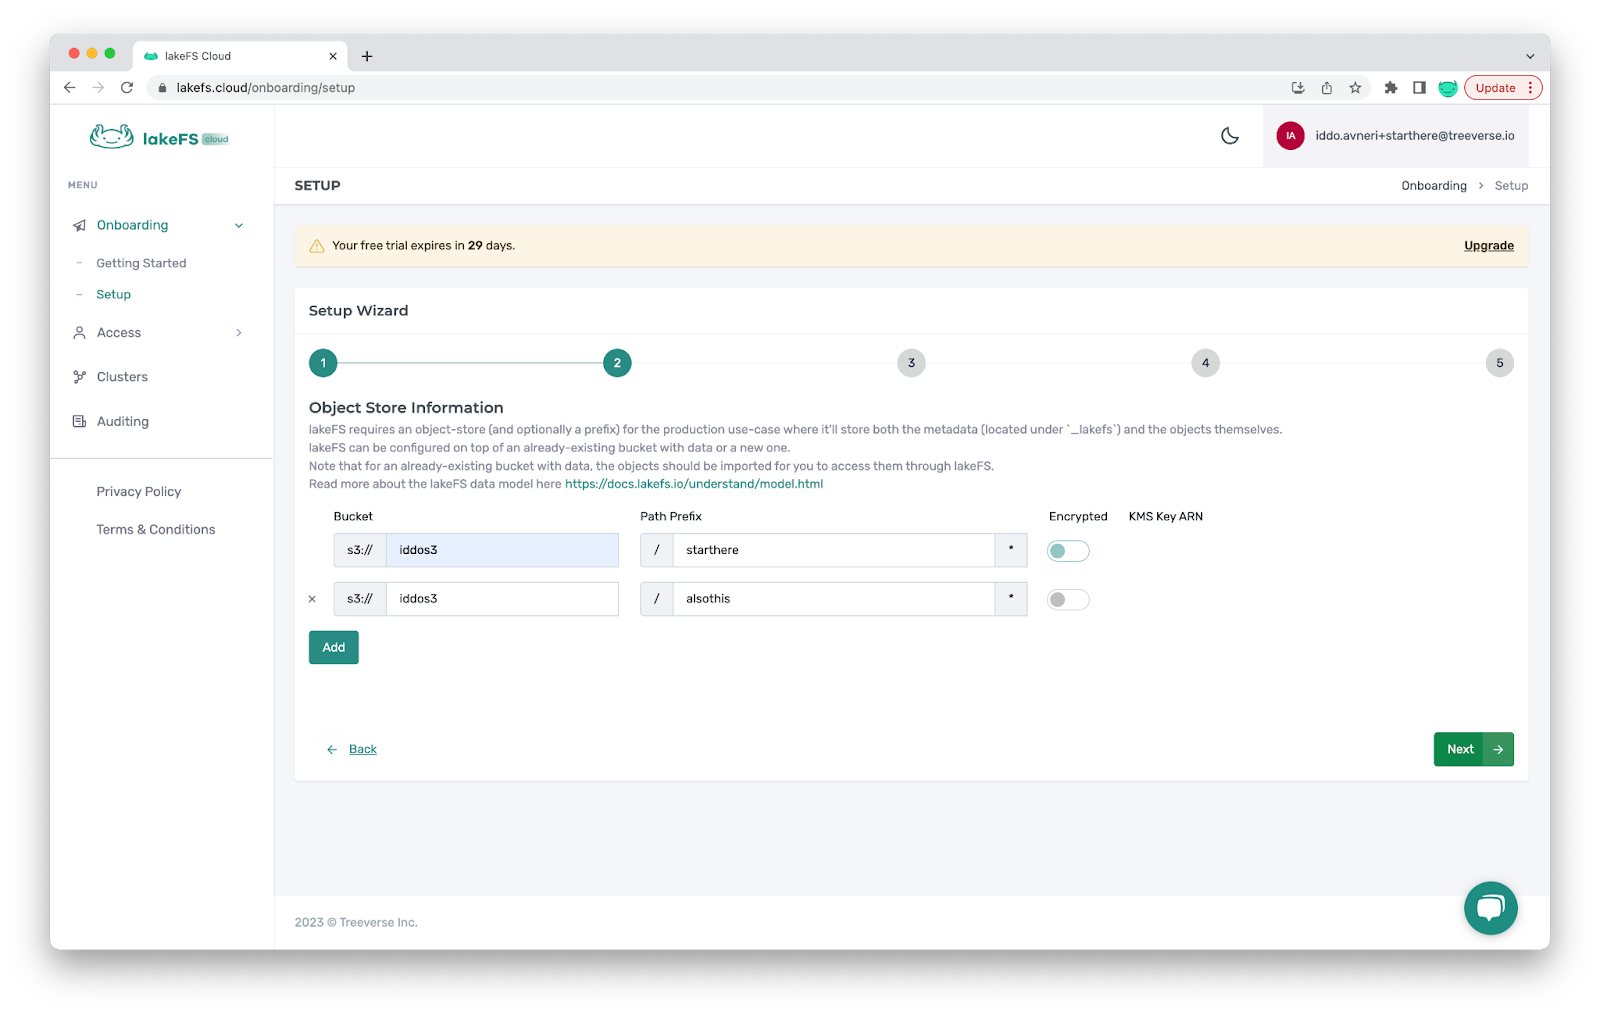
Note you can use multiple buckets and if they’re encrypted, you can paste the encryption key as well.
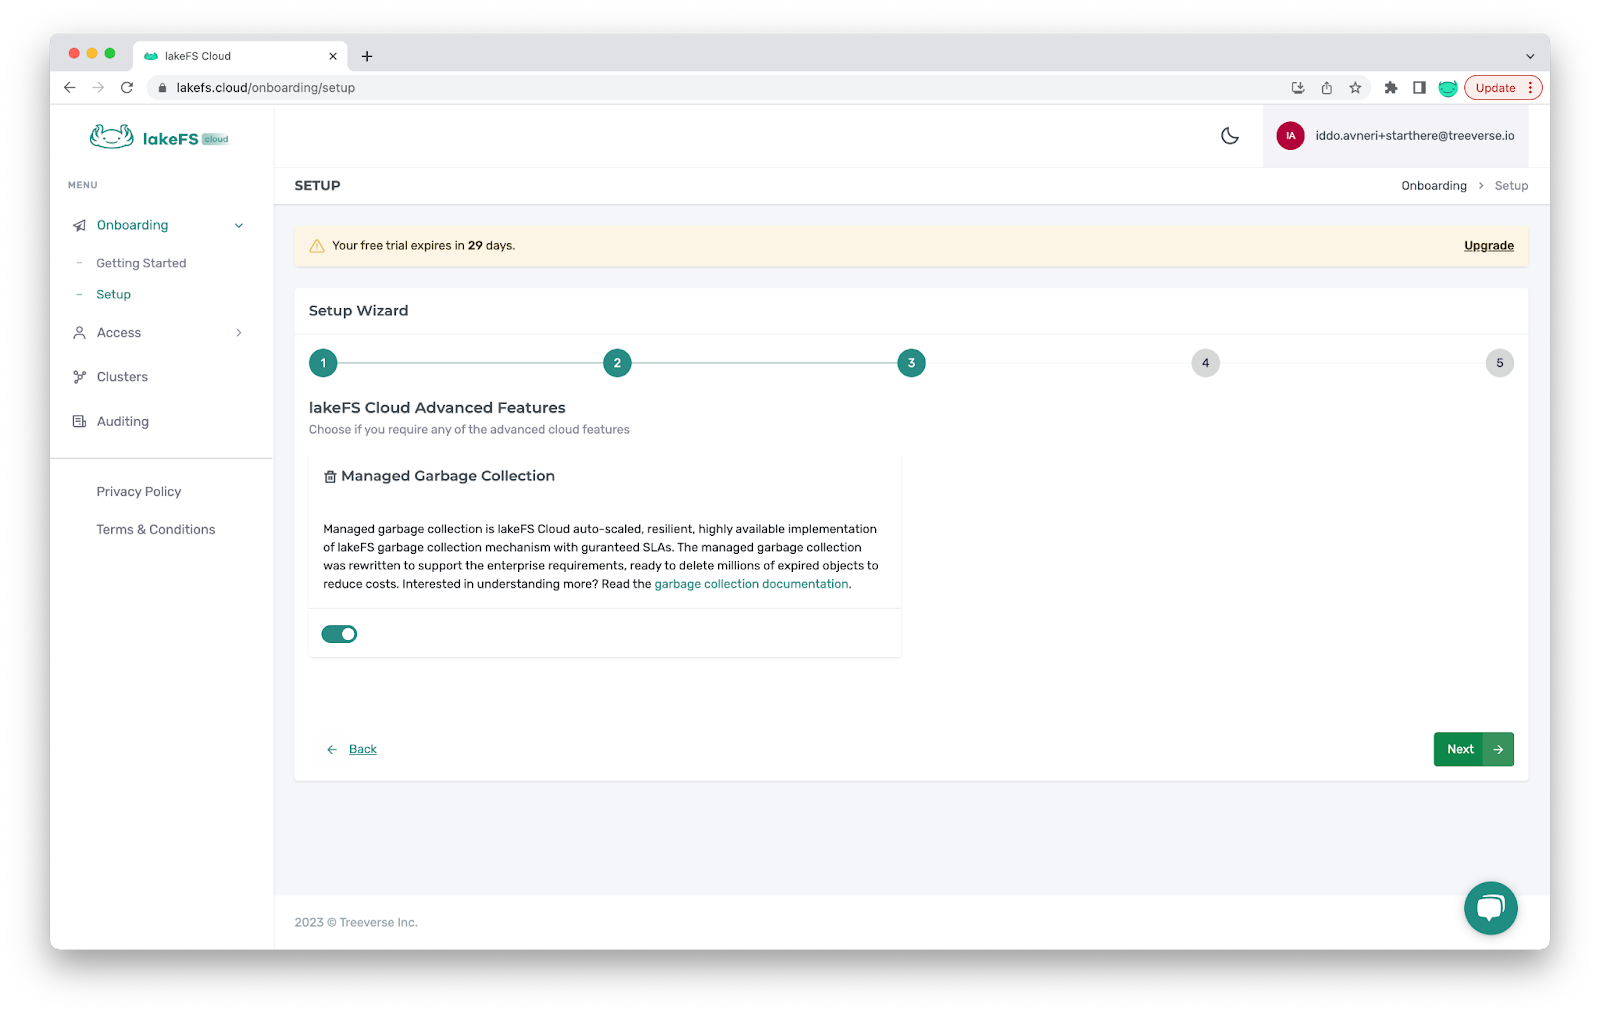
Configure a role for Garbage Collection (GC)
It is HIGHLY recommended to enable GC for both committed and uncommitted objects in your lakeFS szervers. GC in lakeFS is helpful for maintaining a clean, efficient, and cost-effective data lake environment. It helps optimize resource utilization, improves system performance, ensures data hygiene, enhances version control efficiency, and reduces
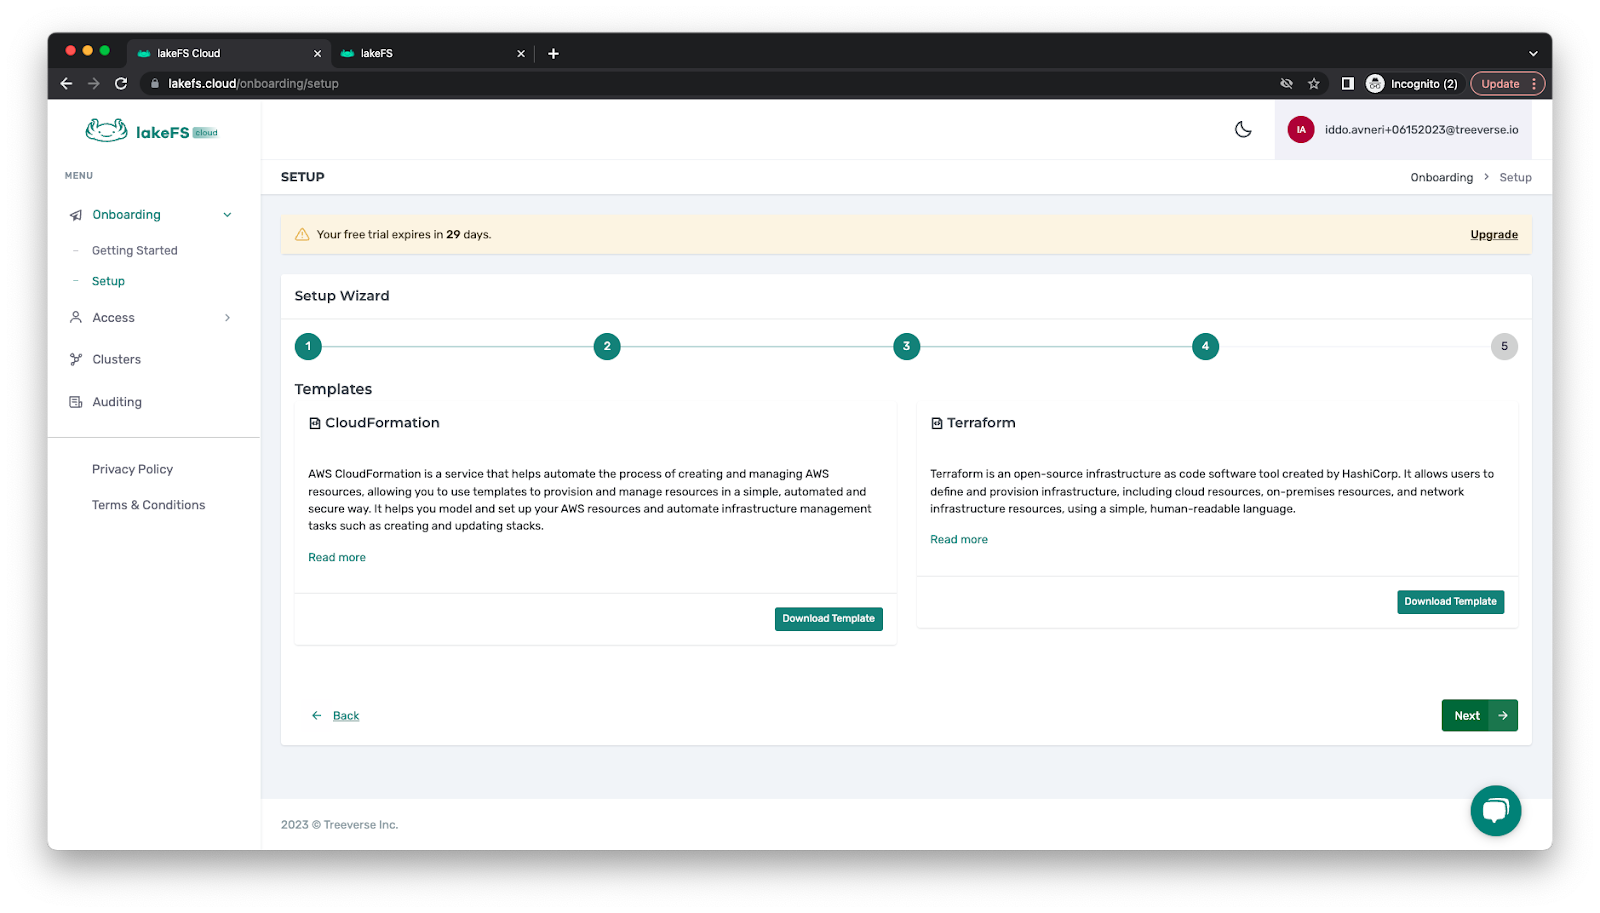
Download a Terraform or a CloudFormation template
Download a Terraform or CloudFormation template, prepopulated with the parameters you’ve entered before.
Switch to your Cloud provider and deploy the template
At this point, switch to your cloud provider and deploy the template. For example, using AWS Cloud formation:

In its output, the CloudFormation will include the key values for the lakeFS server role (AppRoleARN) and the GC role (svcManagedGCRoleARN). Be sure to save both and input them into the lakeFS SetUp Wizard:
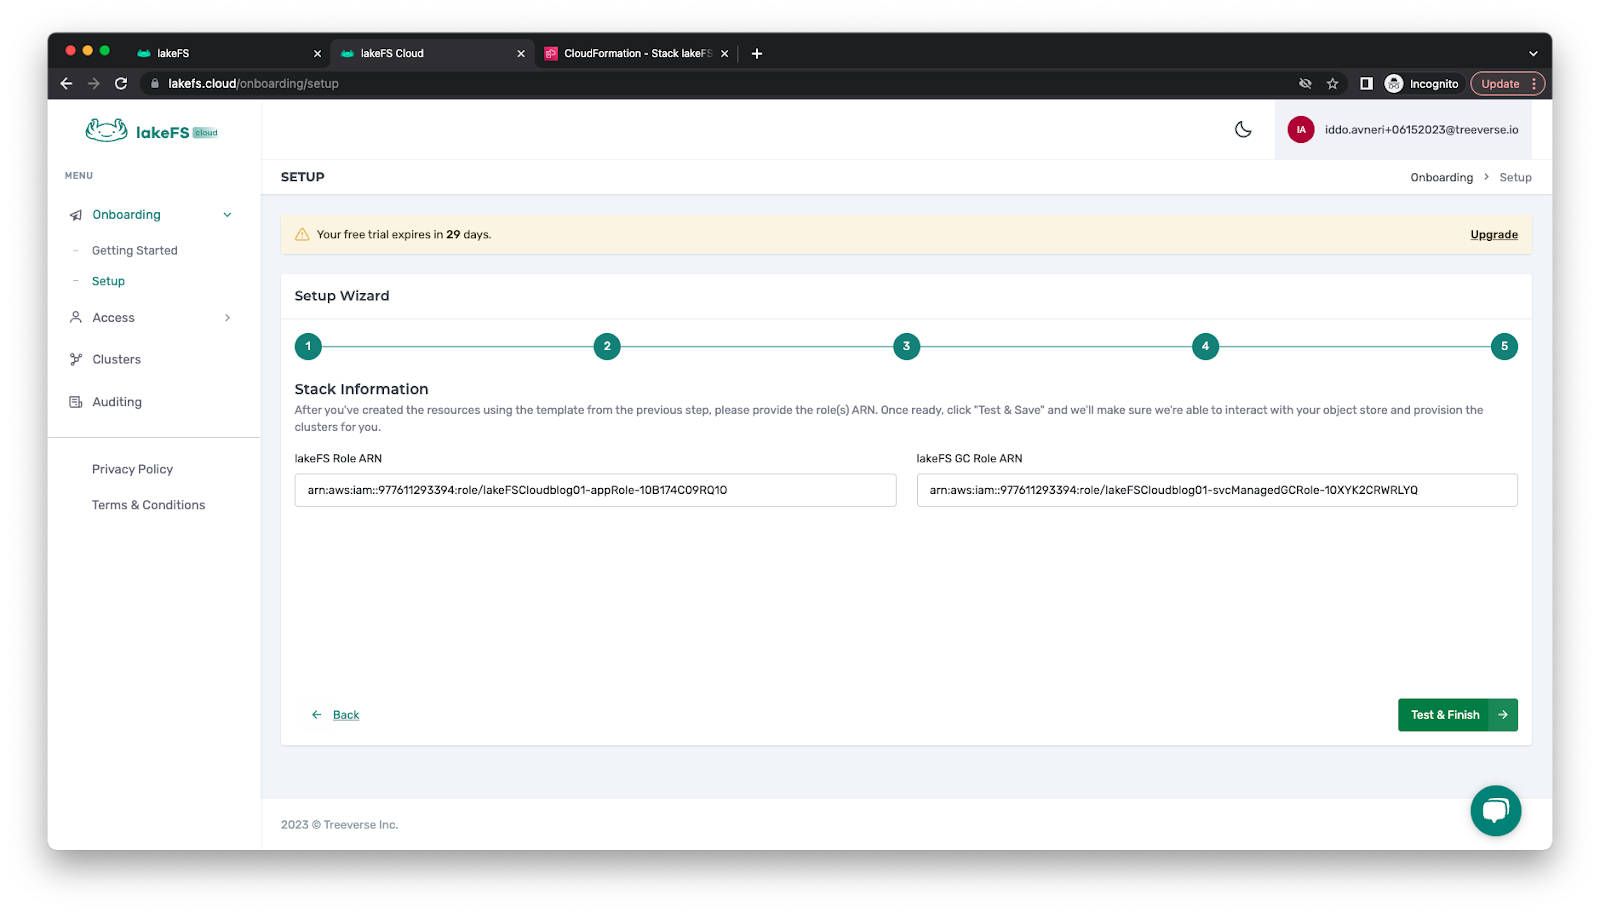
Click “Test & Finish”
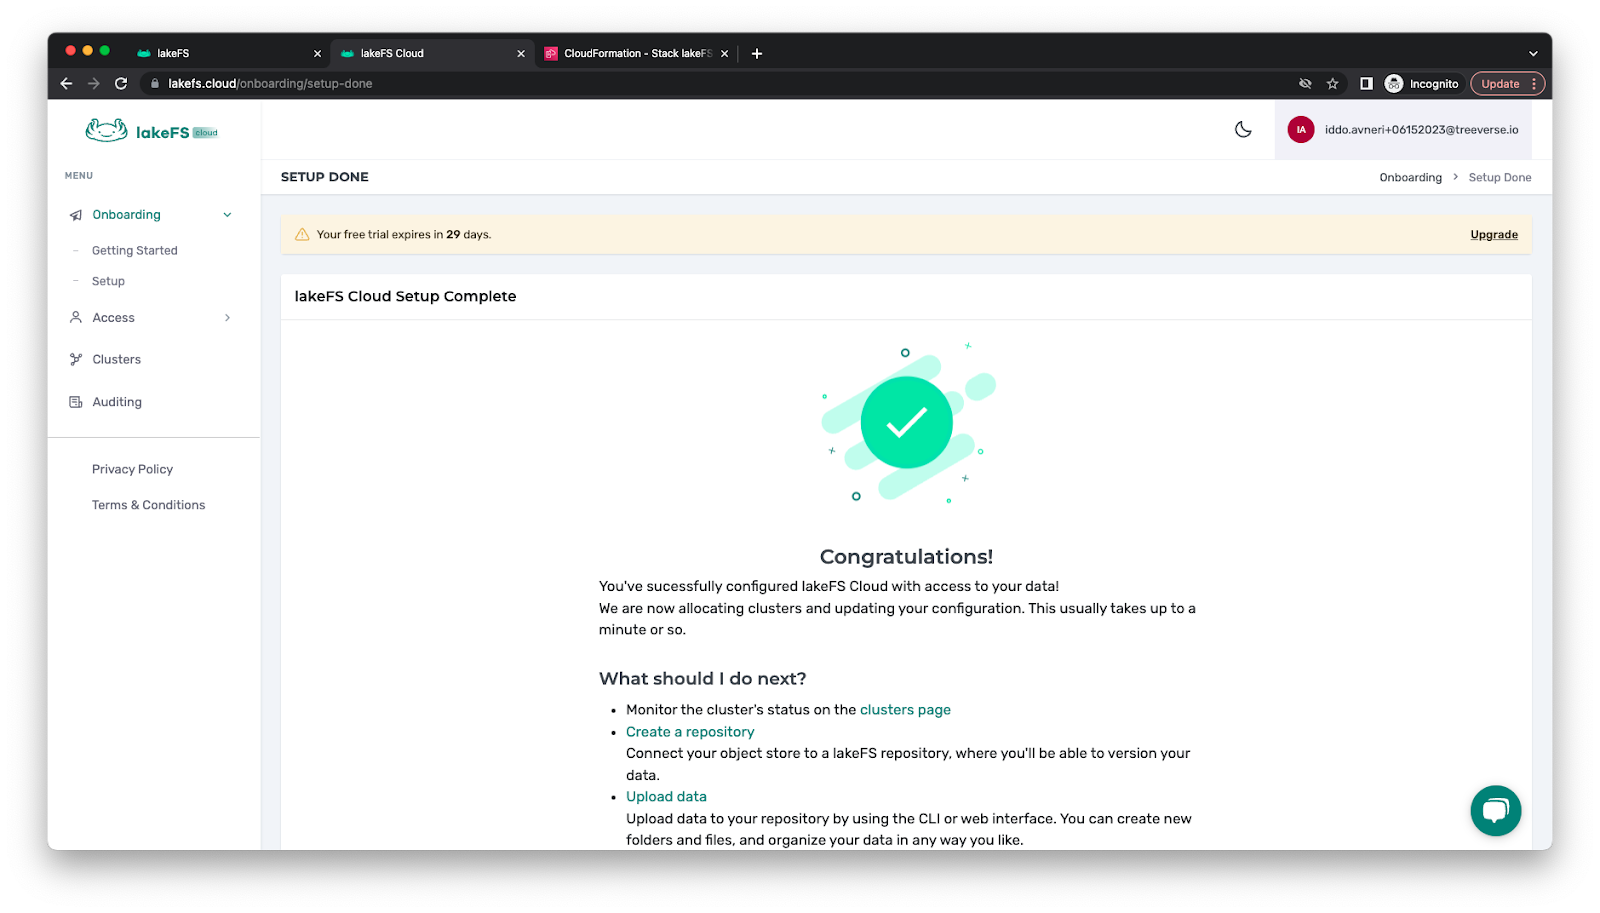
You should now be able to see this screen:
(Optional) Step 6 – Create a repository on your storage
Now that you have configured your lakeFS server to run with the storage sitting in place in your AWS bucket, you can create a repository sitting on top of your buckets.
When creating your repository, make sure you give it a unique namespace following the S3 Path you configured above.
What now?
A good next step now will be to utilize our rich library of sample notebooks examples you can choose to run against your new lakeFS Server.
In addition, here is a short video walking you through these instructions.


